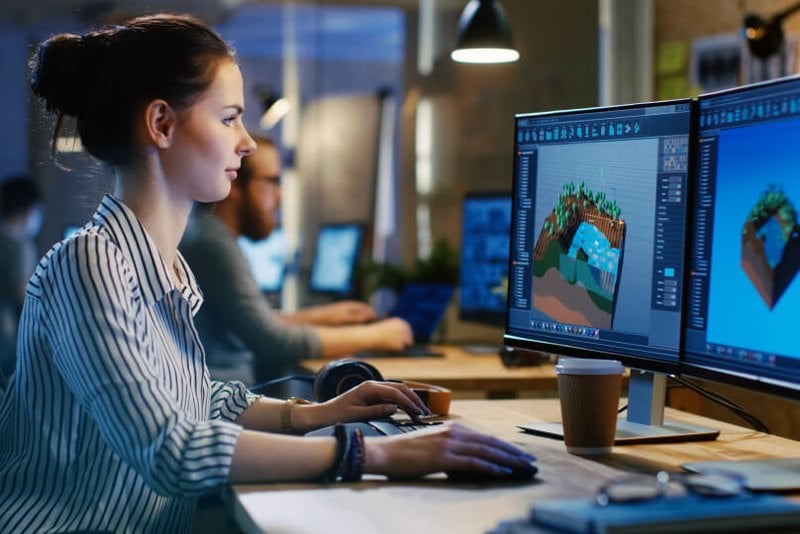
Creating your own 3D characters for animation is no longer something limited to large studios or experienced professionals. Today, students, hobbyists, game creators, and independent filmmakers are all designing animated characters from their own ideas. What once required expensive software and years of training can now begin with accessible tools and a clear workflow.

Still, many beginners feel overwhelmed. Where do you start? Do you need to know how to draw? Which tools should you use? And how do you turn a static 3D model into a character that actually moves and feels alive?
This guide takes a friendly and practical look at how to create your own 3D characters for animation. You will learn the full process, from concept to motion, which tools fit different tasks, and how to avoid common mistakes. This is not just an introduction. It is a step-by-step reference you can return to as your skills grow.
What It Really Means to Create a 3D Character for Animation
When a character is created for animation, every decision is influenced by movement. Proportions, joint placement, topology flow, and even costume design all affect how the character bends, stretches, and reacts during motion. Arms must lift without collapsing, legs must bend naturally, and facial features must deform smoothly during expressions.
In practice, this means that character creation for animation is a balance between visual design and technical structure. The character needs a clear silhouette and personality, but also clean geometry and logical joint areas. Details that look impressive in a still render, such as extremely thin limbs, heavy accessories, or complex shapes, can cause problems when the character is rigged and animated.
Another key aspect is intent. A character made for animation usually has a purpose. It may need to walk, run, speak, or perform actions in a game or short film. Knowing what the character needs to do helps guide modeling choices from the very beginning. For example, a character designed only for posing can be built differently from one that needs full-body animation.
The Big Picture: The 3D Character Creation Pipeline
Before touching any software, it helps to understand the overall workflow. Most animated characters follow the same basic pipeline:
-
Concept and reference
-
Modeling the character
-
Texturing and materials
-
Rigging the character
-
Animating movement
Each stage builds on the previous one. Skipping steps or rushing early stages often leads to problems later, especially during animation.
Step 1: Character Concept and Visual Planning
Every strong character starts with a clear idea. This does not mean you need professional drawings, but you should know what kind of character you are creating.
Ask yourself:
-
Is this character realistic or stylized?
-
Is it human, animal, or fantasy-based?
-
What personality should the character show through posture and movement?
Reference images are extremely important. These can come from photos, movies, games, or sketches. References guide proportions, clothing, and surface details. Even professional artists rely heavily on references.
Key tip: Design characters with animation in mind. Very thin limbs, complex accessories, or extreme proportions may look interesting but can be difficult to animate.
Step 2: 3D Modeling – Building the Character’s Shape
Modeling is where your character takes physical form. This stage focuses on creating the basic shape and structure of the character.
There are two common modeling approaches:
-
Box modeling: Starting from simple shapes and refining them
-
Sculpting: Shaping the character like digital clay
Beginners often start with box modeling for cleaner geometry. Sculpting is great for organic shapes like faces and muscles, but it usually requires retopology later to prepare the model for animation.
Good modeling habits for animation:
-
Keep geometry clean and evenly spaced
-
Avoid unnecessary details early
-
Make sure joints like elbows and knees have enough edge loops
Clean topology makes rigging and animation much easier later.
Step 3: Texturing and Materials – Adding Life to the Model
Once the model is complete, it needs surface detail. Texturing defines color, skin tone, fabric patterns, and material properties like metal or cloth.
Textures are usually created using UV mapping, which unwraps the 3D model into a flat layout. Images are then painted or applied to this layout.
Materials control how the surface reacts to light. Shiny armor, soft skin, and rough fabric all behave differently under lighting.
Beginner-friendly advice:
-
Start with simple colors and materials
-
Focus on clarity rather than extreme realism
-
Test your textures under different lighting conditions
A simple, well-lit character often looks better than an overly detailed one with poor lighting.
Step 4: Rigging – Preparing the Character to Move
Rigging is the process of adding a digital skeleton to your character. This skeleton controls how the model moves during animation.
Bones are placed inside the model, and each part of the mesh is assigned to specific bones. This process is called skinning or weight painting.
Good rigging allows:
-
Arms and legs to bend naturally
-
Facial expressions to work smoothly
-
The character to hold poses without distortion
Many beginners struggle here, but modern tools provide auto-rigging systems that make this step more accessible.
Common beginner mistake:
Rushing rigging. Poor weights lead to broken deformations during animation.
Step 5: Animation – Bringing the Character to Life
Animation is where everything comes together. Instead of moving the mesh directly, animators move the rigged bones over time.
Basic animation concepts apply even in 3D:
-
Timing and spacing
-
Weight and balance
-
Clear poses
Beginners should start with simple animations:
-
Idle pose
-
Walk cycle
-
Simple gestures
These exercises teach how movement flows through the character’s body.
Choosing the Right Tools for Each Stage
There is no single tool that does everything best. Choosing tools based on the task saves time and frustration.
For Modeling and Animation
-
Blender: Free and powerful, great for beginners and professionals
-
Maya: Industry standard for animation pipelines
For Sculpting
-
ZBrush: Excellent for detailed sculpting
-
Blender Sculpt Mode: Beginner-friendly alternative
For Texturing
-
Substance Painter: Professional texturing tool
-
Blender Texture Paint: Simple and accessible
For Rigging
-
Blender Rigify: Built-in auto-rigging
-
Mixamo: Automatic online rigging for humanoid characters
Simple rule:
-
Learning and indie projects → Blender
-
Studio pipelines → Maya + ZBrush + Substance
Using AI Tools to Support 3D Character Creation
AI tools are becoming helpful assistants in the early and middle stages of 3D character creation, especially for beginners. While AI cannot replace core skills like modeling, rigging, or animation, it can significantly speed up planning, ideation, and preparation work.
One of the most common uses of AI in character creation is concept development. Instead of starting with a blank page, creators can use AI image tools to generate rough visual ideas based on text descriptions. These images are not final designs, but they help answer early questions such as body type, clothing style, or overall mood. This is especially useful for beginners who struggle with drawing or visualizing characters.
AI tools can also support reference gathering. By describing a character's role, personality, or environment, creators can quickly generate or discover visual references that guide modeling decisions. Having clear references reduces guesswork and leads to stronger proportions and silhouettes.
Another practical use of AI is texture and material planning. AI can suggest color palettes, fabric patterns, or surface details that match a character's theme. While textures still need to be properly created and applied inside 3D software, AI helps creators experiment with visual ideas before committing time to detailed work.
Beginner Workflow: from idea to animated character
For beginners, the biggest challenge in 3D character creation is not learning individual tools, but understanding how everything fits together. A clear and repeatable workflow helps reduce confusion and prevents beginners from getting stuck halfway through a project.
Here is a practical beginner-friendly workflow that mirrors how many successful creators learn:
Step 1: Define the character idea
Start with a simple concept. Decide what kind of character you are making and what it needs to do. Is it a game character, an animated short character, or a practice model? Keep the scope small. One clear purpose is better than many vague ideas.
Step 2: Gather references and inspiration
Collect reference images for body proportions, clothing, and style. Use photos, movies, games, or AI-generated concept images as visual guides. References help you avoid guessing and keep your design consistent.
Step 3: Create a clean base model
Begin modeling with simple shapes. Focus on proportions and overall form rather than details. Make sure the topology is clean and evenly spaced, especially around joints like shoulders, elbows, hips, and knees. At this stage, the model should look simple but solid.
Step 4: Add basic materials and colors
Apply simple materials to separate different parts of the character, such as skin, clothing, and accessories. Do not aim for realism yet. This step helps you see the character clearly under lighting and catch proportion issues early.
Step 5: Rig the character early
Before adding fine details, create a basic rig using auto-rigging tools if available. Test simple poses like raising arms or bending knees. Early rig testing reveals topology problems that are much harder to fix later.
Step 6: Animate a simple motion
Create a basic animation such as an idle pose, walk cycle, or simple gesture. This step confirms whether the rig and model work together. Even a short animation teaches valuable lessons about balance, weight, and movement.
This workflow emphasizes testing early and keeping things simple. Many beginners make the mistake of adding too much detail before confirming that the character can move properly. By following this process, you build skills in the correct order and avoid unnecessary frustration.
Learning Path: How to Build Skills Over Time
Creating animated characters is a skill that grows step by step.
Stage 1: Learn basic modeling and navigation
Stage 2: Understand topology and simple rigging
Stage 3: Practice animation fundamentals
Stage 4: Combine all steps into complete characters
Short projects are better than endless tutorials. Finish small characters often.
When 3D Characters Are Not Ready for Animation
A model may look good but still fail in animation if:
-
Joints collapse when bending
-
Weights are uneven
-
Proportions restrict movement
Always test basic poses before committing to full animation.
Long-Term Character Creation Checklist
Think of this checklist as a loop:
-
Define the character's purpose
-
Design with movement in mind
-
Model clean geometry
-
Test rigging early
-
Animate simple actions
-
Review and improve
Repeating this cycle builds skill faster than rushing complex projects.
Final Thoughts: Turning Ideas Into Moving Characters
Creating your own 3D characters for animation is a journey that combines creativity and technical skill. With the right workflow, tools, and mindset, anyone can begin bringing characters to life.
Start simple. Focus on fundamentals. Use tools wisely. Over time, your characters will move better, look stronger, and express more personality.
The most important step is starting. Your first character does not need to be perfect. It just needs to exist.
Related Articles
 How to Design a Custom Skin Using Construction Software Tools
- Trading Guide for Roblox 99 Nights in the Forest
- How to Quickly Buy and Trade Steal a Brainrot Items via Starpets Lite
- A Beginner's Guide to 3D Estimating Software and Its Benefits
- Your Guide to Game Design: Turn Your Ideas Into Playable Worlds
- Everything ElseHow to Design a Custom Skin Using Construction Software Tools
- Everything ElseTrading Guide for Roblox 99 Nights in the Forest
- Everything ElseHow to Quickly Buy and Trade Steal a Brainrot Items via Starpets Lite
- Everything ElseA Beginner's Guide to 3D Estimating Software and Its Benefits
- Everything ElseYour Guide to Game Design: Turn Your Ideas Into Playable Worlds